Update: I have been getting questions on the exact cubes I used to make this. I used these – Closet Maid 9 Cube Organizer.
I’ve been procrastinating with this post. I mean, this post is really really late….I posted a picture of the finished product on Instagram in December! So about 4 months ago, but I still wanted to share here with you all what I did.
I have been wanting my own workspace for a long time now, and after seen a bunch of craft tables that we could not afford, I took to Pinterest for some inspiration. I found a lot!! Most of them, the tutorials seemed easier than expected, and left me saying – now why didn’t I think of that??
I really needed a space to work during the day while I’m home with the girls. I needed a space that was tall enough so that they couldn’t come over and start grabbing paints and glitter from the desk. And I needed a place with storage.
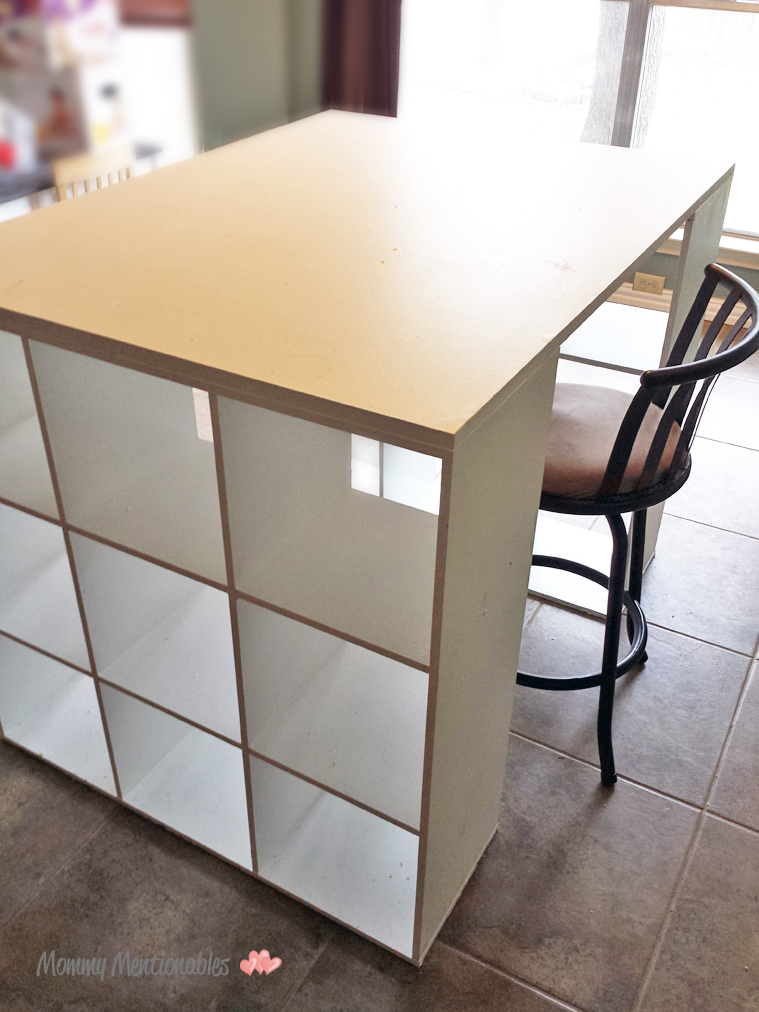
I’m not going to write out everything I did because I basically followed a tutorial I found, to the T, and you can find that below. What I will tell you though, is a few things that I probably would have done differently if I had to chance to do it again. (Update: The original poster is no longer on the web, however I will say that we just basically cut an MDF board to the size and attached it to the top of the cubicles. Get the color you want and do not paint the cubes! More on that below.)
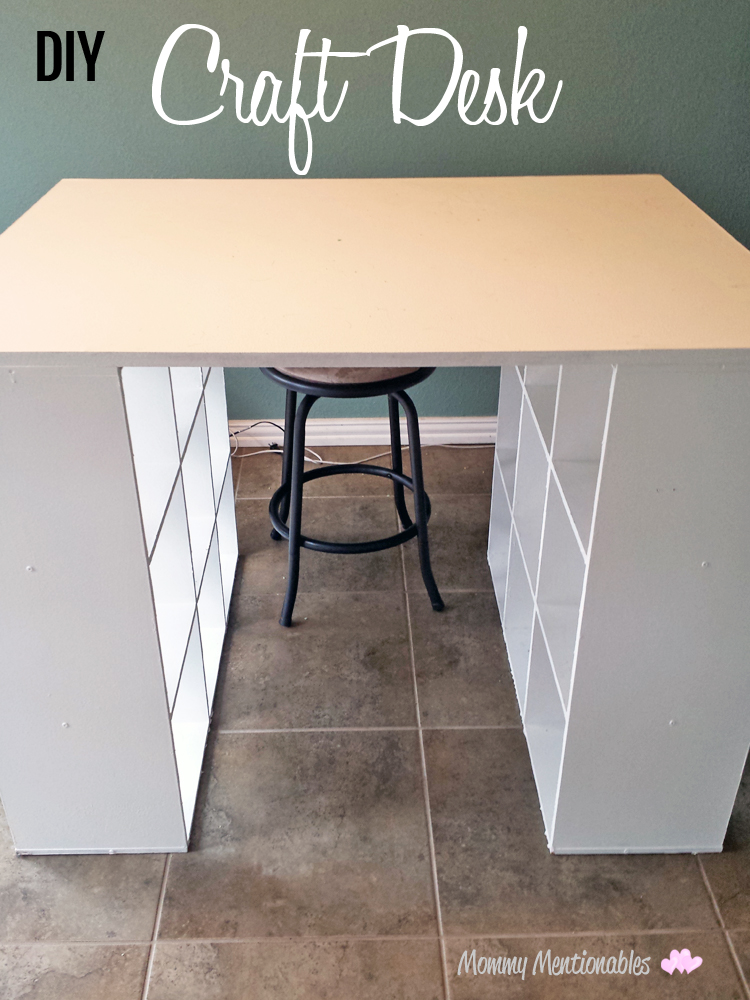
I used the Closet Maid 9-Cube Organizer. You can get them online from Amazon or even at Target or Walmart. I bought 3×3, although now that it’s built I realized that I probably could have gone with the 2×3. I think I would have preferred a smaller table. I guess it all depends on how much space you really need.
I would not recommend painting the cubicles. I would buy the color that you want, then leave them that way and just paint the MDF board on top. The cubicles come in white, natural and a dark brown wood color. I originally bought the natural color thinking I was going to leave it as is, then changed my mind and decided I wanted them white. So I tried painting them…
Well, it was a lot of work trying to get the paint to stick. We sanded it down and primed it, but we still had issues with the top layer of sealant coming through. That caused it to come through the paint like air pockets, although they aren’t air pockets, it’s the top sealant that just did not want to take the paint. So we sanded it down farther and repainted. It was alot of work. The MDF board that attaches to the top can be painted with anything. it’s just the cubicles that gave us problems. I didn’t add trim to the sides, I think it looked ok as it but you can add trim to fancy it up.
It looked easier than I thought, and it definitely would have been if we had decided to leave the cubicles unpainted.